|
|
原文链接:【移动安全】Frida hook基础
概述
Frida是个轻量级so级别的hook框架,它可以帮助逆向人员对指定的进程的so模块进行分析。它主要提供了功能简单的python接口和功能丰富的js接口,使得hook函数和修改so编程化,值得一提的是接口中包含了主控端与目标进程的交互接口,由此我们可以即时获取信息并随时进行修改。使用frida可以获取进程的信息(模块列表,线程列表,库导出函数),可以拦截指定函数和调用指定函数,可以注入代码,总而言之,使用frida我们可以对进程模块进行手术刀式剖析。
安装特定版本frida
Frida的安装很简单,需要在PC安装frida客户端和在手机内安装frida服务端。
例如安装特定版本frida如12.11.10
- pip3 install frida==12.11.10
然后在github内通过搜索对应的frida版本找到frida-tools对应的版本
pip3 install frida-tools==8.1.3pip3 install objection==1.9.6
操作frida模式,命令、RPC
以Python+Javascript混合脚本方式运行Frida(两种模式)
通常使用命令行运行Frida Js脚本如下
# frida -UF -l agent/20200905.js U:usb设备F: 当前手机最前台的APPl: 加载脚本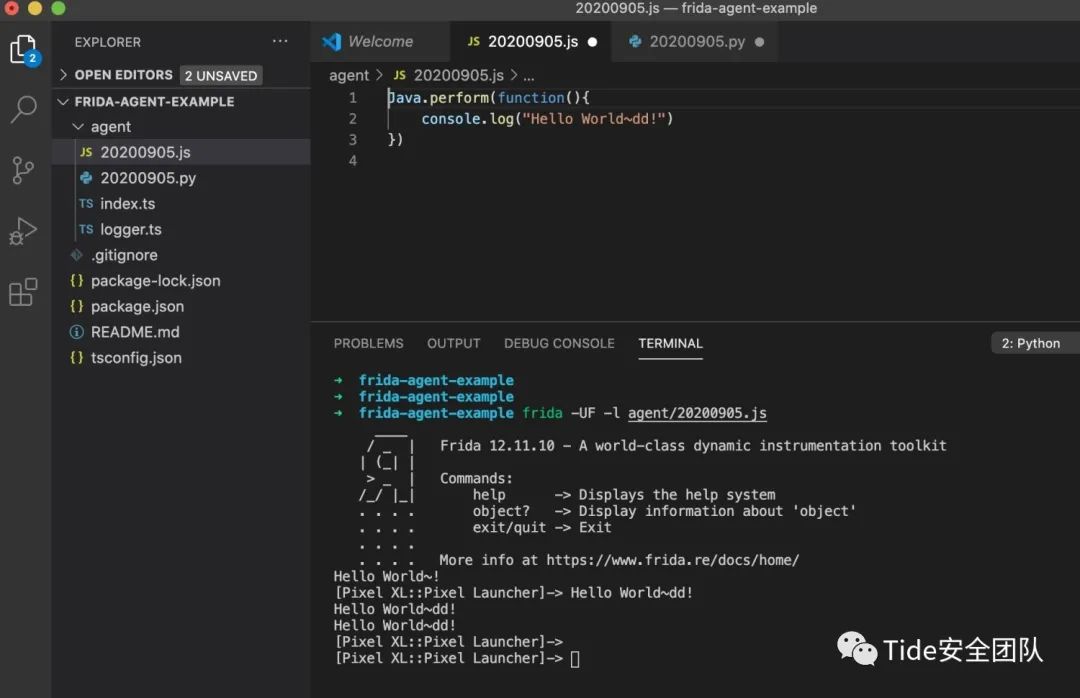 
如下脚本的第一步是通过get_usb_device用于寻找USB连接的手机设备,然后打印出应用信息,并获取pid,在应用运行过程中将脚本注入。
frida两种操作App模式:attach(应用运行过程中注入到进程)、spawn(在进程创建时注入)
frida-ls-devices可以展示当前环境所有可以插桩的设备
frida-ps展示当前PC所有进程(一个进程往往意味着一个应用)
frida-ps -U即意味着展示usb所连接设备的进程信息。
- import frida
- device = frida.get_usb_device()
- print(device.get_frontmost_application())
- pid = device.get_frontmost_application().pid
- session = device.attach(pid)
- with open("20200905.js") as f:
- script = session.create_script(f.read())
- script.load()
- input()
objection内存漫游辅助
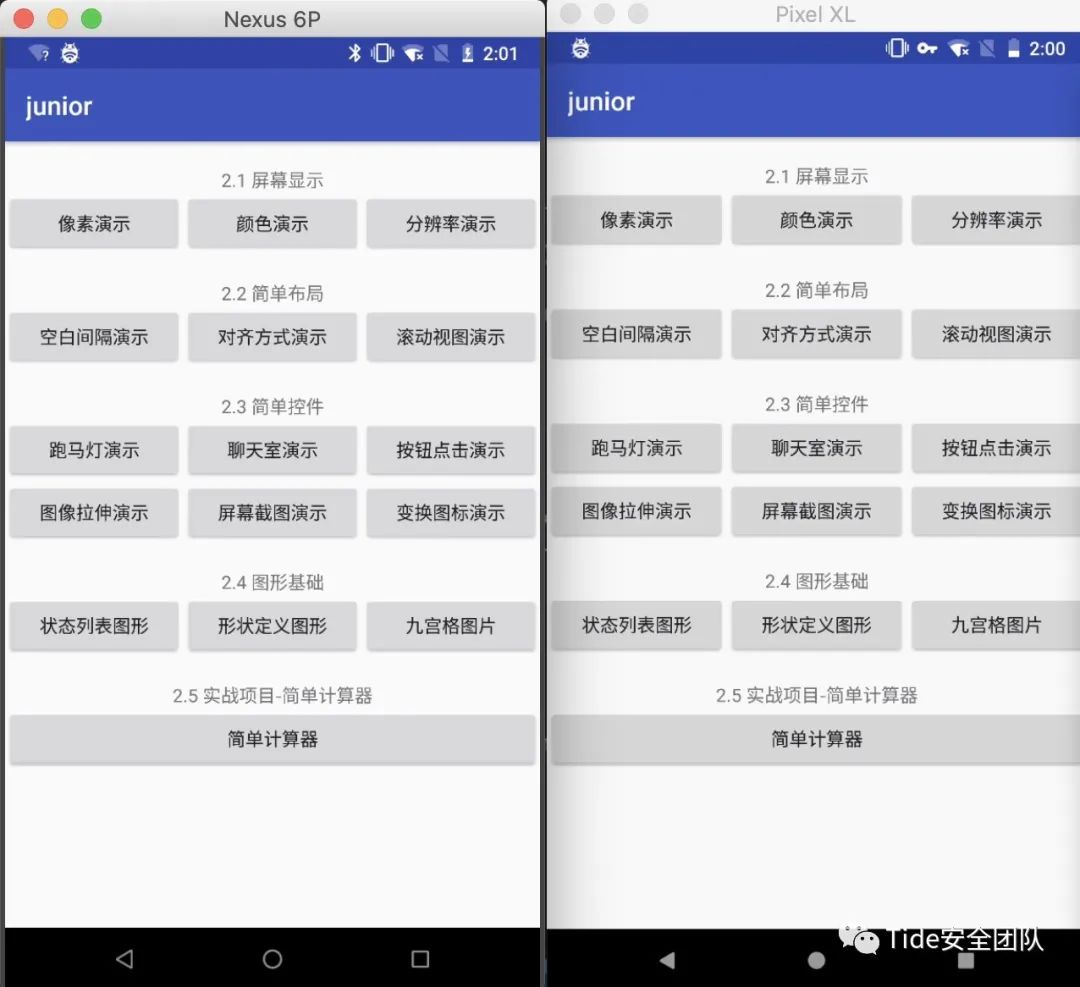
安装本次演示的调试App
- adb install -r -t /Users/tale/Downloads/junior.apk
使用objection对junior该App进行hook:
- objection -g com.example.junior explore
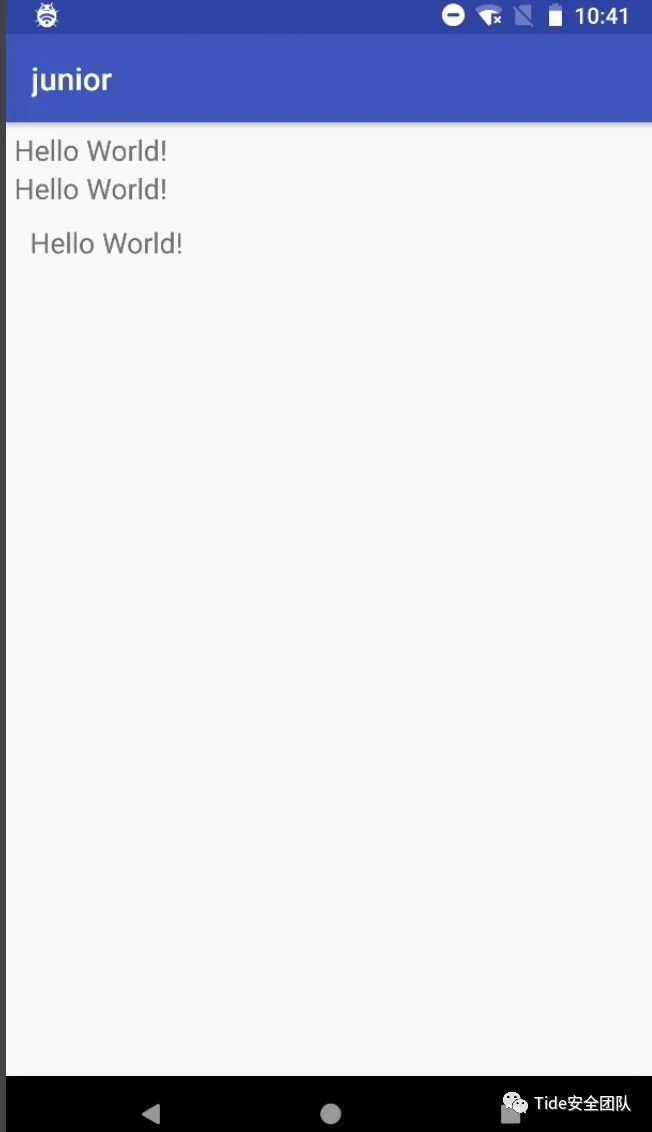
hook点击junior启动第一个模块“像素演示”时,发现出现了该类com.example.junior.util.Utils
从objection历史日志中过滤下该类com.example.junior.util.Utils主要判断有没有经过
- cat objection.log |grep -i com.example.junior.util.Utils
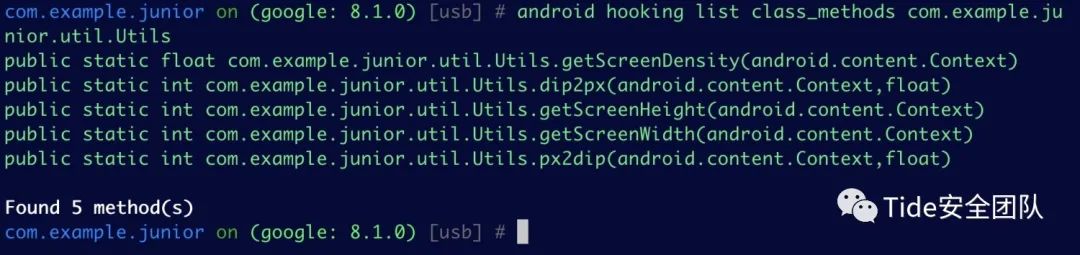
然后打印该类中的方法
- android hooking list class_methods com.example.junior.util.Utils
尝试hookcom.example.junior.util.Utils.dip2px看有没有经过
- android hooking watch class_method com.example.junior.util.Utils.dip2px --dump-args --dump-backtrace --dump-return
当点击模块“像素演示”时,发现打印了参数和返回值,所以验证了经过该类。
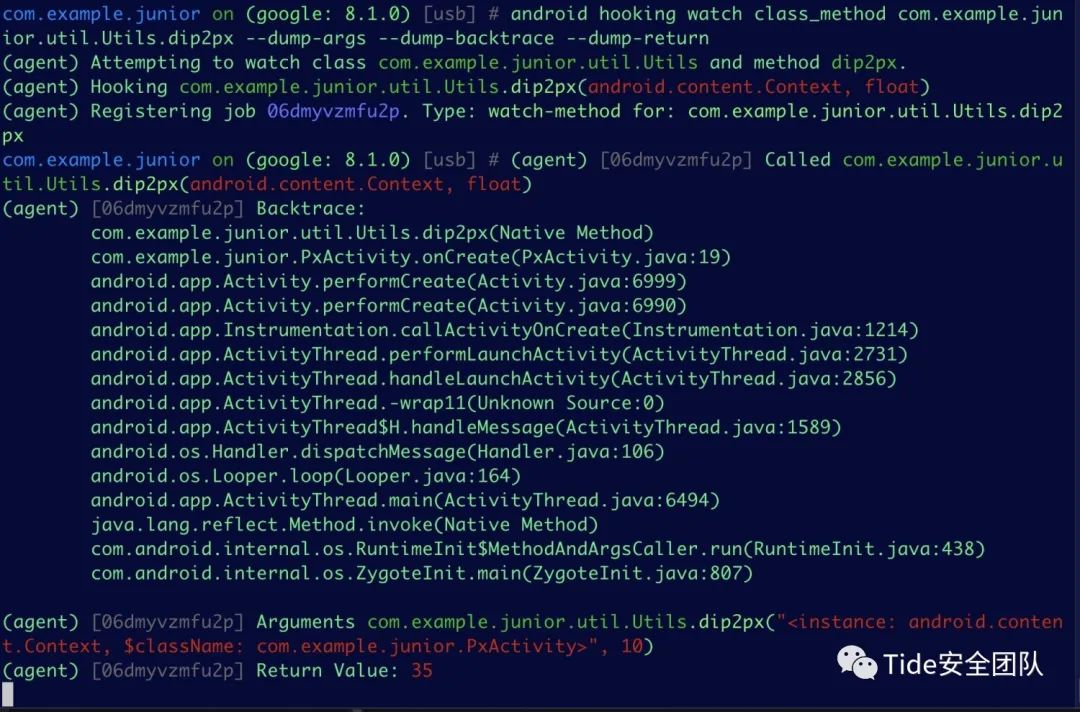
以上为objection的快速定位分析方法,但objection做不到修改参数和返回值
frida hook修改参数和返回值
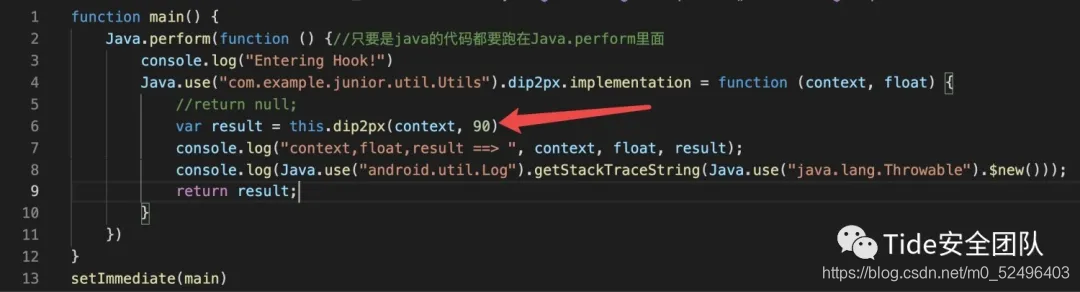
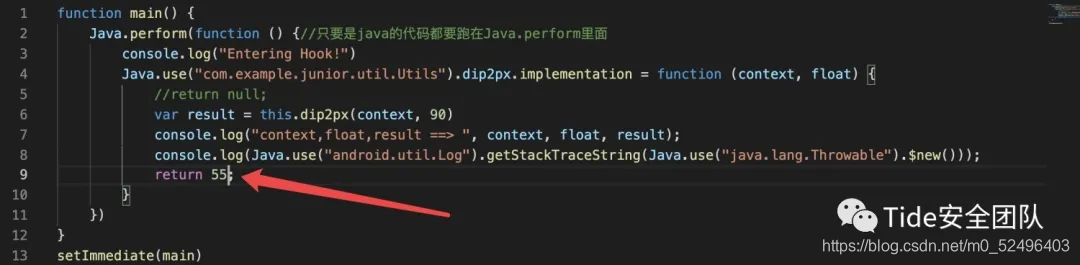
使用frida hook可以修改参数和返回值,首先我们打印出该参数、返回值、调用栈。
- function main() {
- Java.perform(function () {//只要是java的代码都要跑在Java.perform里面
- console.log("Entering Hook!")
- Java.use("com.example.junior.util.Utils").dip2px.implementation = function (context, float) {
- //return null;
- var result = this.dip2px(context, float)
- console.log("context,float,result ==> ", context, float, result);
- console.log(Java.use("android.util.Log").getStackTraceString(Java.use("java.lang.Throwable").$new()));
- return result;
- }
- })
- }
- setImmediate(main)

然后可以直接进行修改参数和返回值如下:
修改之前参数为10:
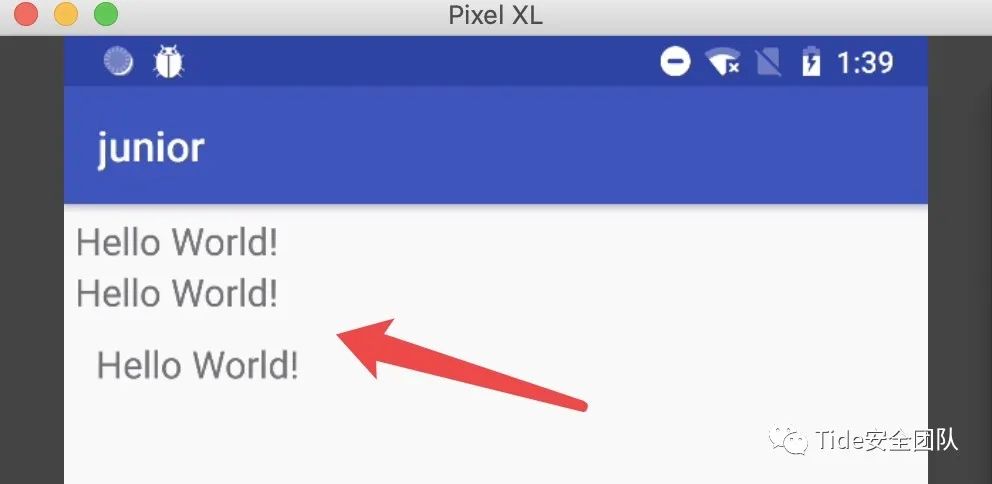
修改为90之后:
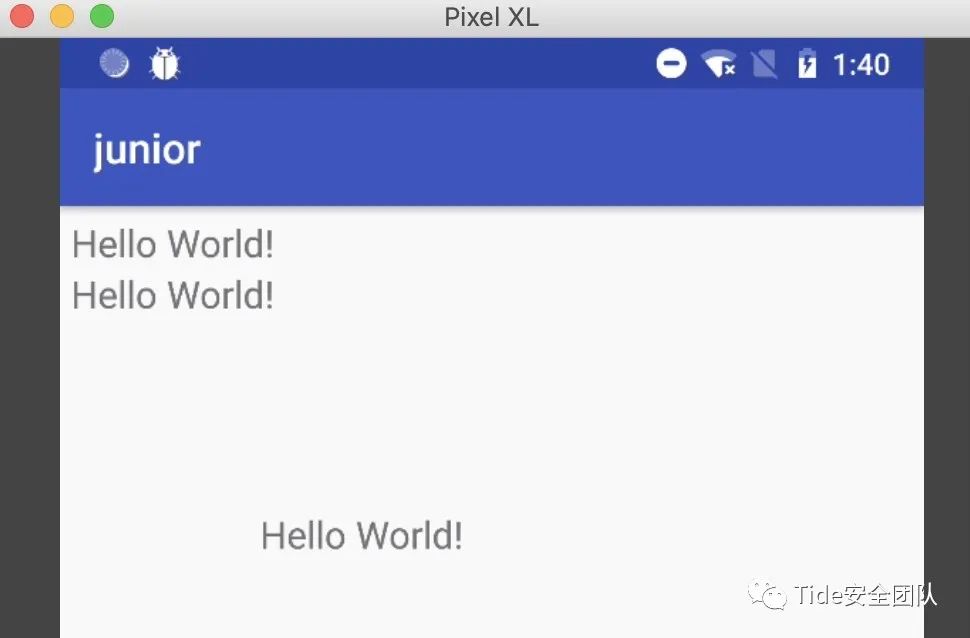
同理修改返回值:
忽略方法实现过程,构造参数、主动调用
例如以下代码,主动调用该类的sub方法,原参数str2构造为2
- function sub(){
- Java.perform(function(){
- Java.use("com.example.junior.util.Arith").sub.overload('java.lang.String', 'java.lang.String').implementation = function(str1,str2){
-
- var javaString = Java.use("java.lang.String")
- var result = this.sub(str1,javaString.$new("2"));
- console.log("str1,str2,result==>",str1,str2,result)
- return javaString.$new("10");
- }
- })
- }
- setImmediate(sub)
主动调用中的域、类方法、实例方法处理
使用wallbreaker插件查看如下域、类方法、实例方法
- objection -g com.example.junior explore -P ~/.objection/plugins
- com.example.junior on (google: 8.1.0) [usb] # plugin wallbreaker classsearch Arith
- libcore.util.ZoneInfo$CheckedArithmeticException
- java.lang.ArithmeticException
- com.example.junior.util.Arith
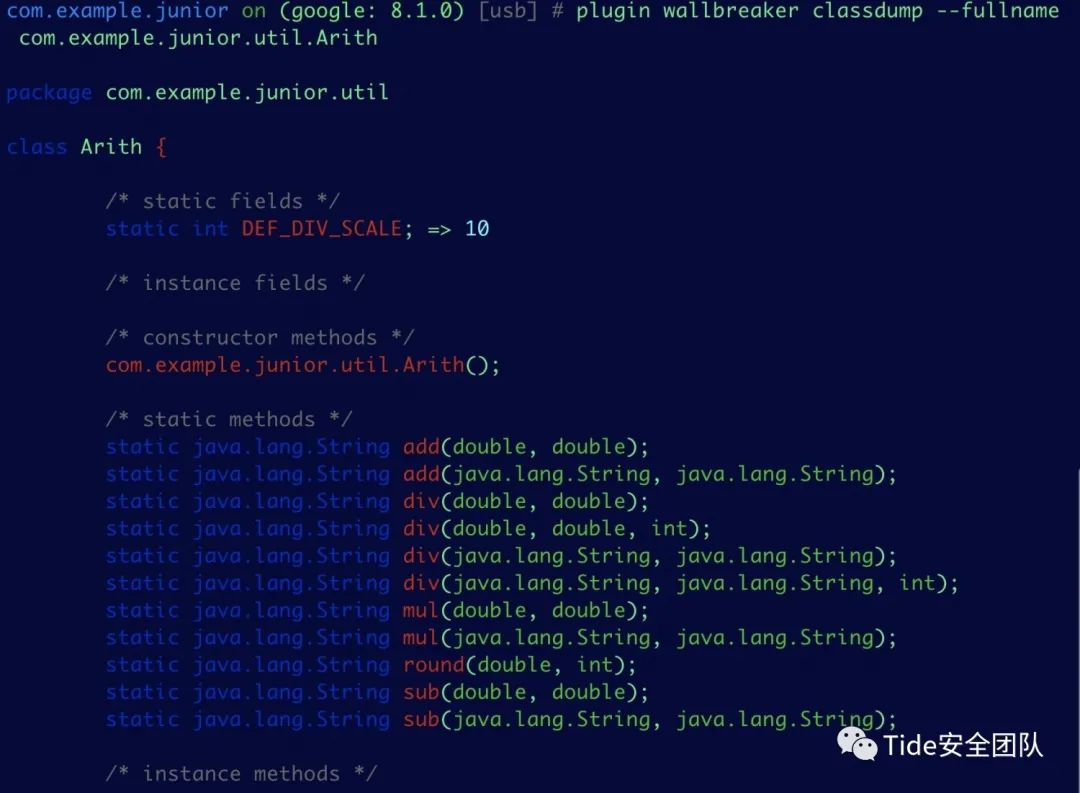
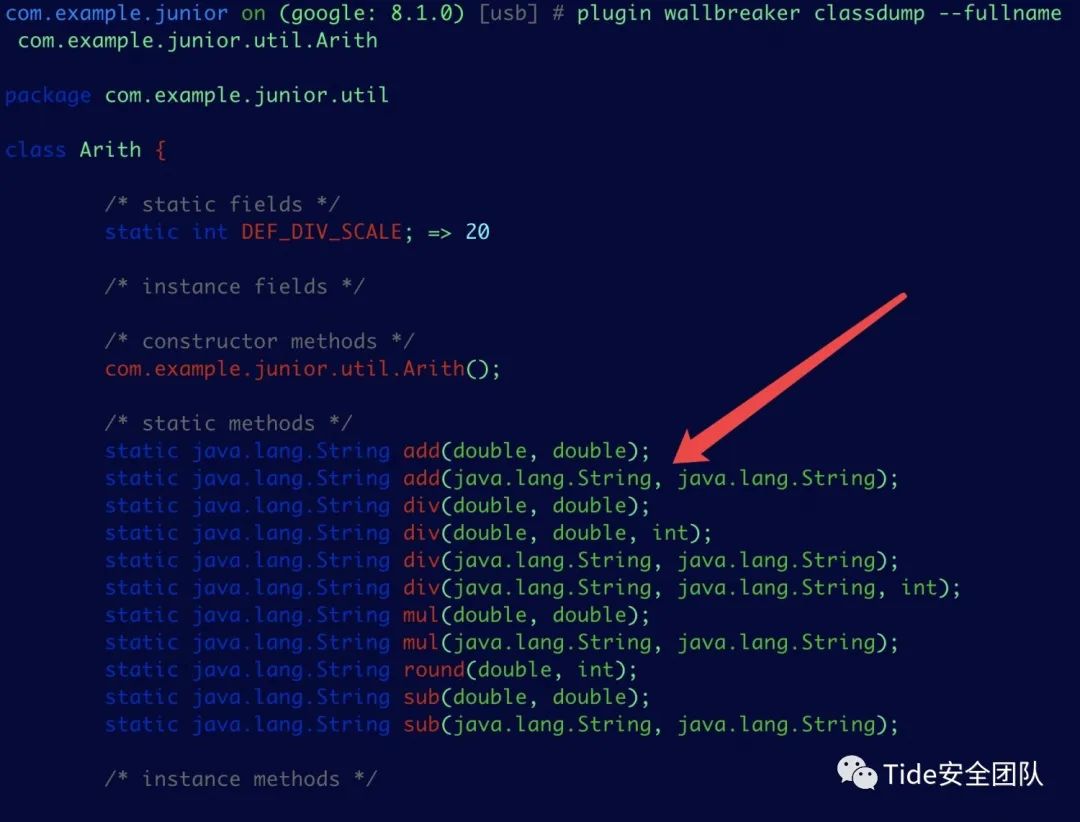
- com.example.junior on (google: 8.1.0) [usb] # plugin wallbreaker classdump --fullname
- com.example.junior.util.Arith
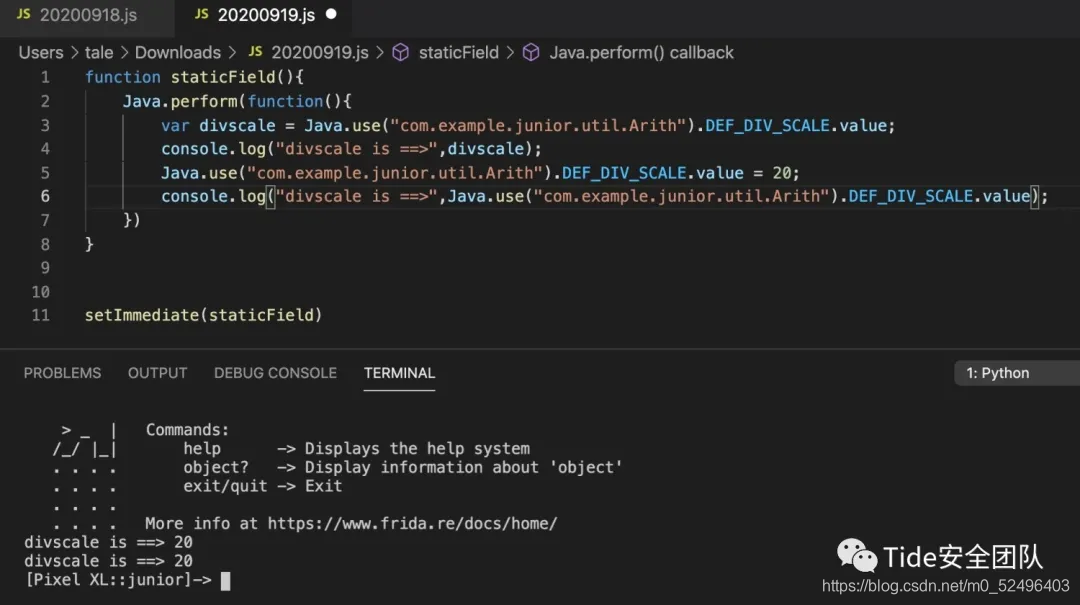
可以发现该静态域static int DEF_DIV_SCALE; => 10
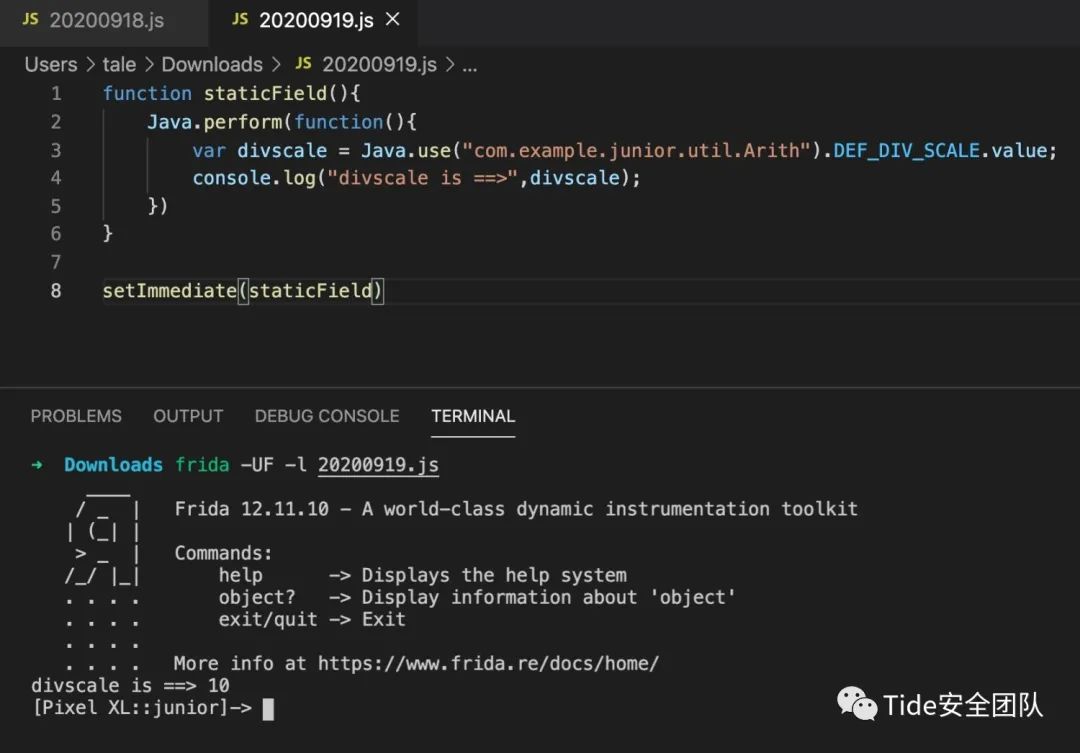
通过如下代码可以得到同样的静态域:static int DEF_DIV_SCALE; => 10
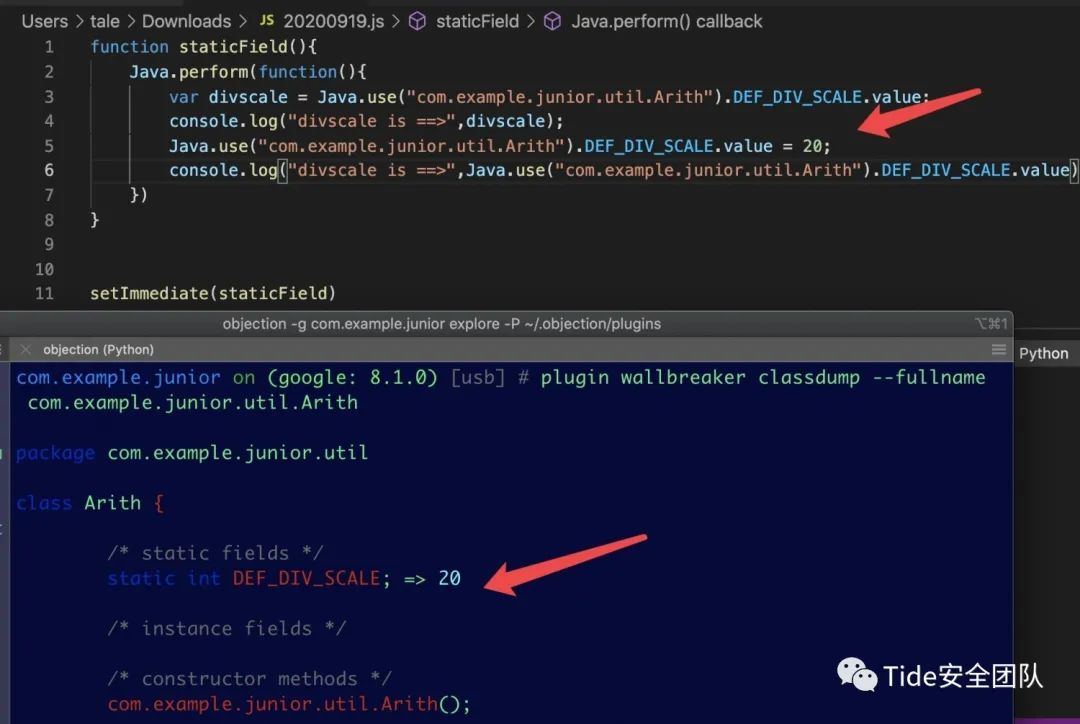
也可以对静态域进行直接赋值
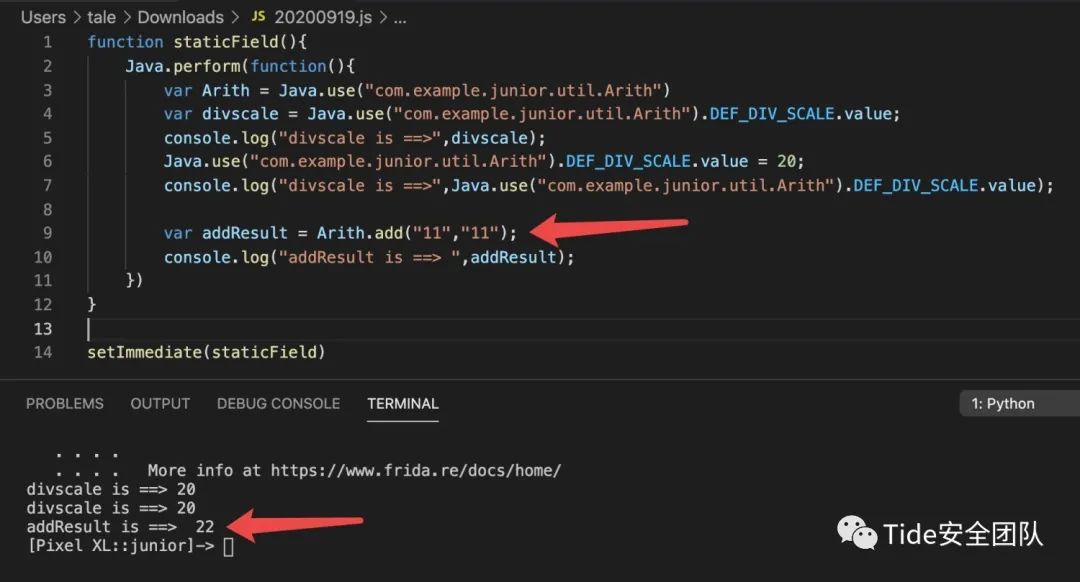
主动调用静态域内的add方法:
可以看到构造的方法已经生效
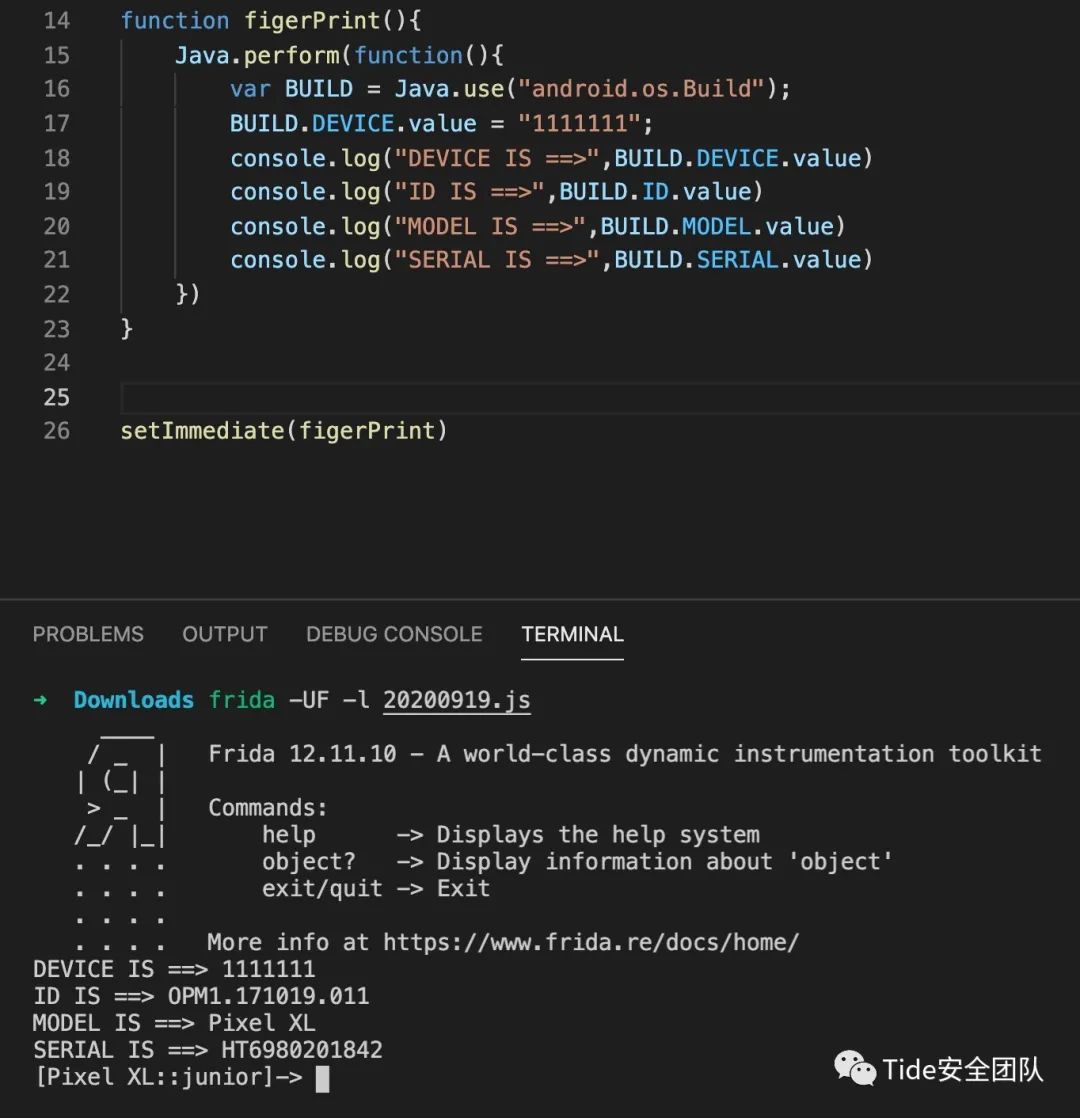
也可以hookandroid.os.Build更改设备信息
- <code>com.example.junior on (google: 8.1.0) [usb] # plugin wallbreaker classdump --fullname</code><code> android.os.Build</code>
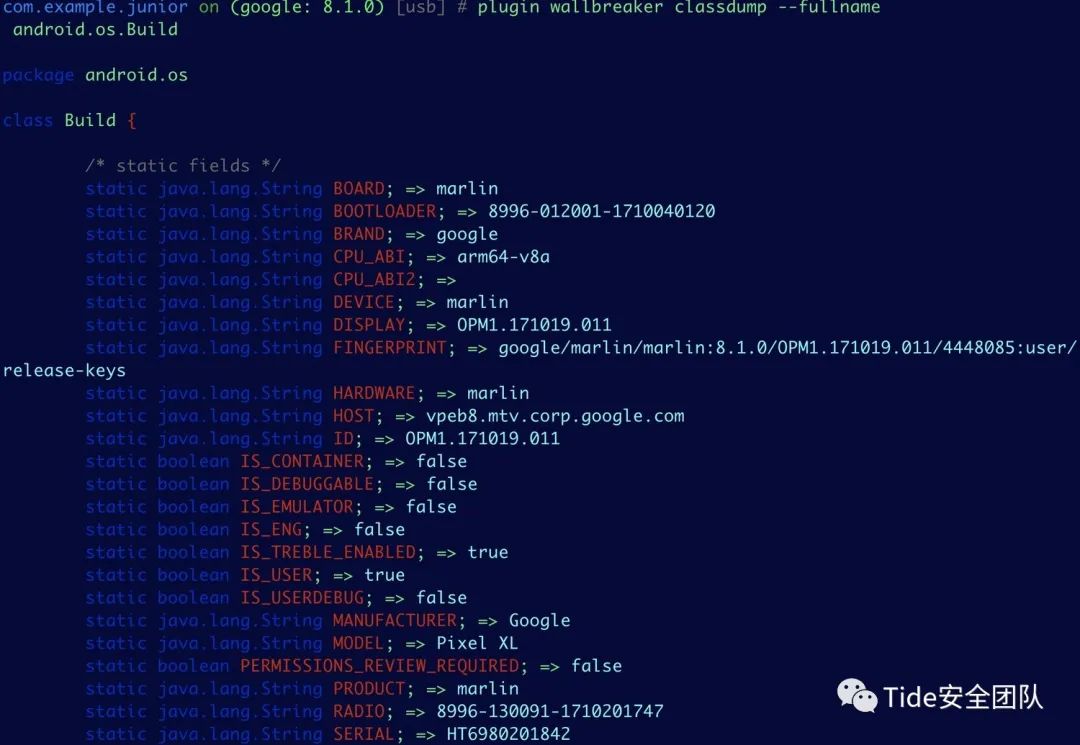
发现可以成功修改,设备型号、序列号等设备信息:
对于动态域:
- <code>com.example.junior on (google: 8.1.0) [usb] # plugin wallbreaker classsearch CalculatorActivity</code><code>com.example.junior.CalculatorActivity</code><code>com.example.junior on (google: 8.1.0) [usb] # plugin wallbreaker classdump --fullname com.example.junior.CalculatorActivity</code>
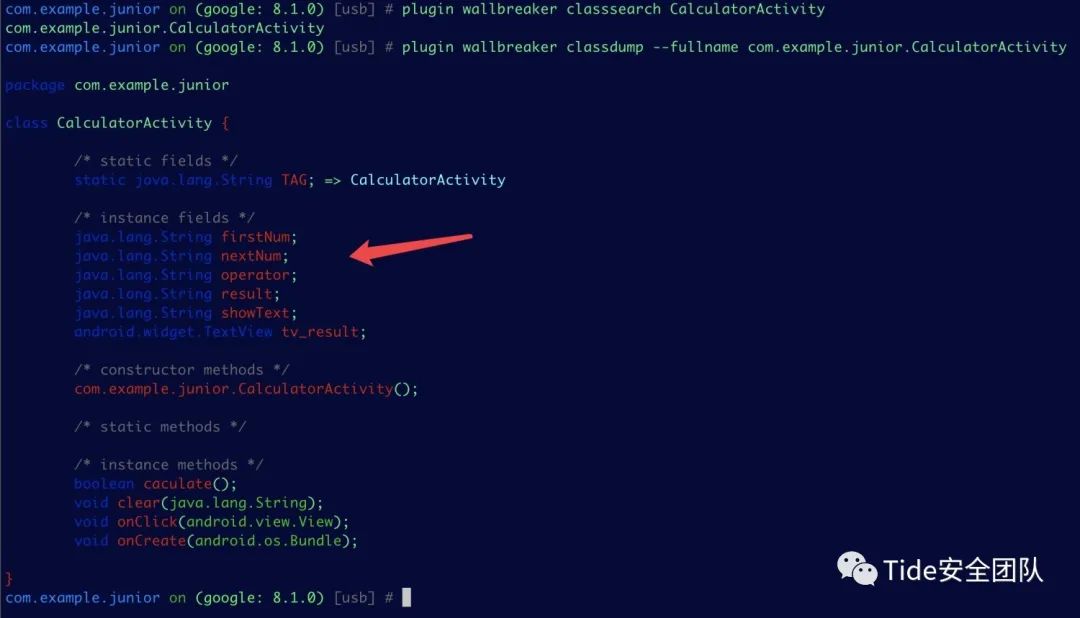
发现有动态域,然后去内存搜实例:
com.example.junior on (google: 8.1.0) [usb] # plugin wallbreaker objectsearch com.example.junior.CalculatorActivity[0x240a]: com.example.junior.CalculatorActivity@1d7c6b9然后查看该实例的动态域信息:
com.example.junior on (google: 8.1.0) [usb] # plugin wallbreaker objectdump 0x240a
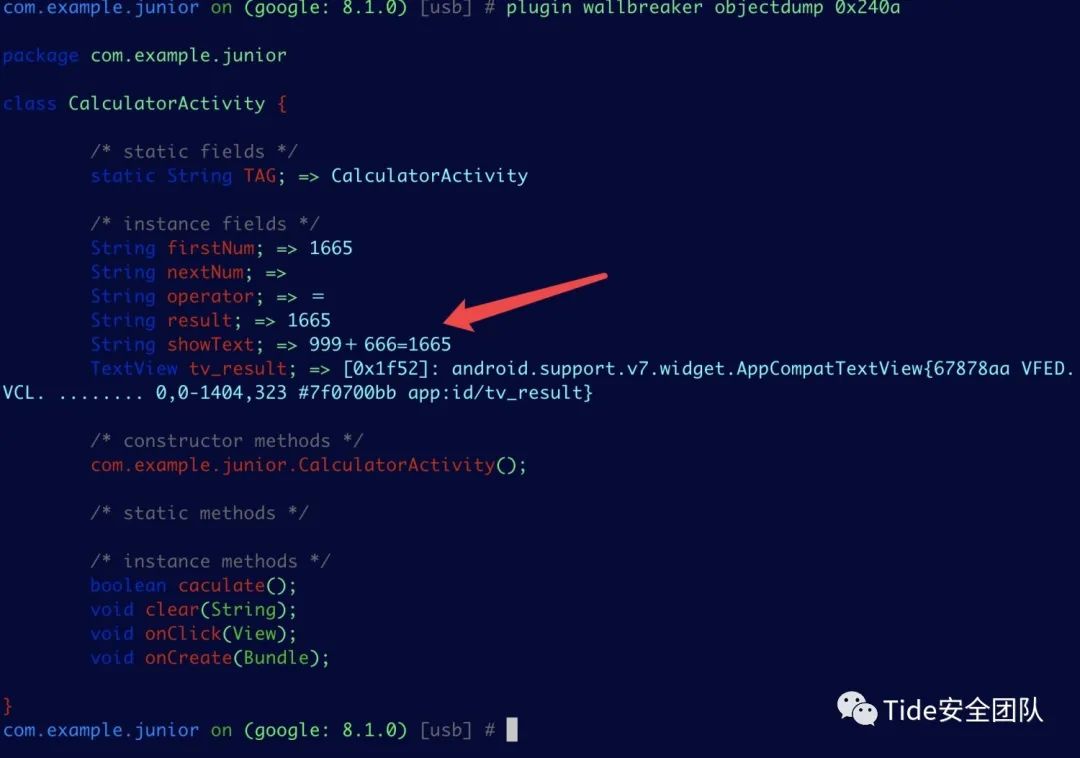
所见即所得:

从代码里看showText信息:
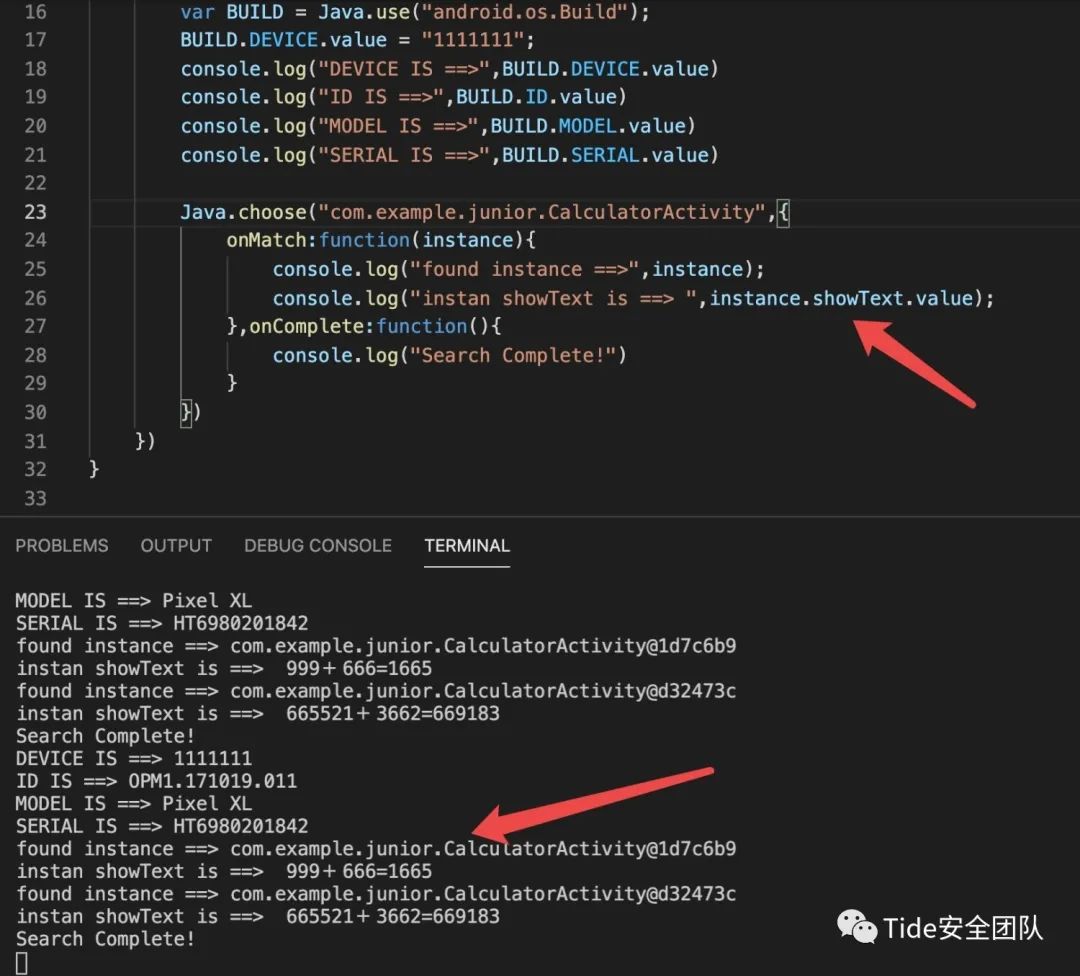
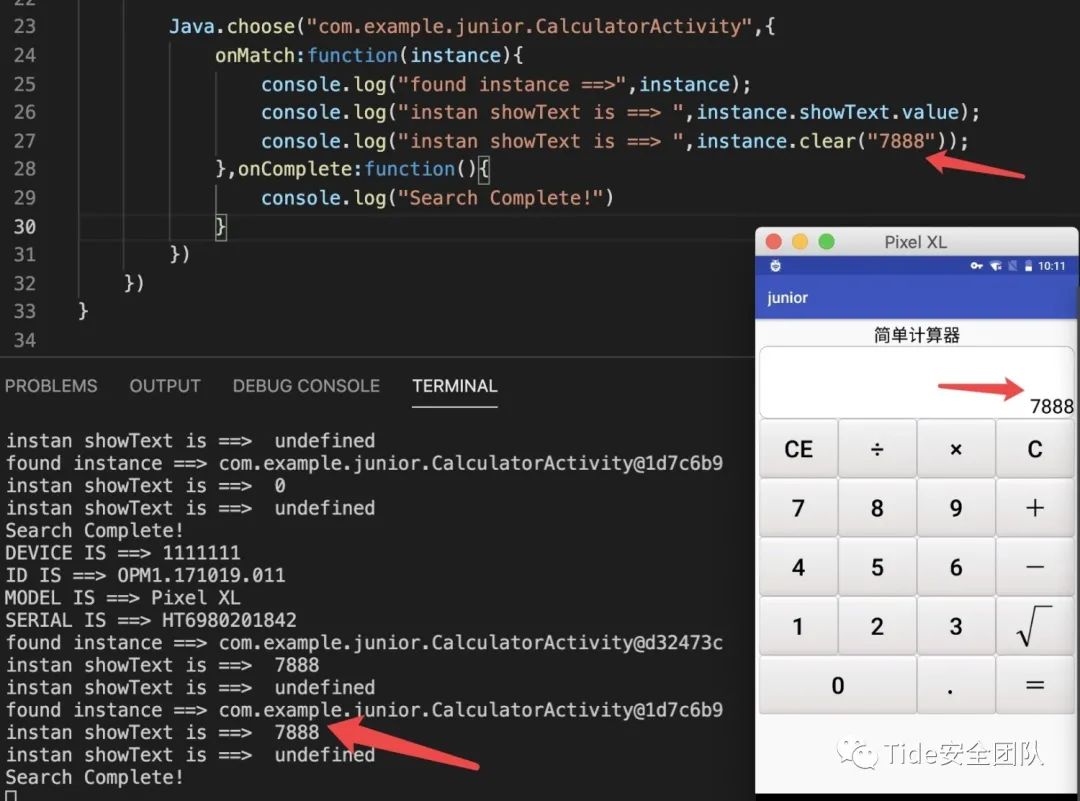
更改动态域clear方法,展示为7888”
- Java.choose("com.example.junior.CalculatorActivity",{
- onMatch:function(instance){
- console.log("found instance ==>",instance);
- console.log("instan showText is ==> ",instance.showText.value);
- console.log("instan showText is ==> ",instance.clear("7888"));
- },onComplete:function(){
- console.log("Search Complete!")
RPC实现App自动重启,模拟点击,挂脚本
搭建使用nps隧道实现单公网IP远控内网frida-server集群


简单测试代码如下:
- import time
- import frida
- device7 = #frida.get_device_manager().add_remote_device('172.16.100.57:5555')
- # device7 = frida.get_device_manager().add_remote_device('110.110.110.110:57777')
- #device = frida.get_usb_device()
- print(device7.get_frontmost_application())
- #pid = device.get_frontmost_application().pid
- #session = device.attach(pid)
- pid7 = device7.spawn(["com.example.junior"])
- device7.resume(pid7)
- time.sleep(1)
- session7 = device7.attach(pid7)
- # 加载s1.js脚本
- with open("20200919.js") as f:
- script7 = session7.create_script(f.read())
- script7.load()
- script7.exports.fingerprint()
- time.sleep(2)
- script7.exports.subcommand()
- device8 = #frida.get_device_manager().add_remote_device('172.16.100.88:5555')
- # device8 = frida.get_device_manager().add_remote_device('110.110.110.110:58888')
- #device = frida.get_usb_device()
- print(device8.get_frontmost_application())
- pid8 = device8.spawn(["com.example.junior"])
- device8.resume(pid8)
- time.sleep(1)
- session8 = device8.attach(pid8)
- # 加载s1.js脚本
- with open("20200919.js") as f:
- script8 = session8.create_script(f.read())
- script8.load()
- script8.exports.fingerprint()
- time.sleep(2)
- script8.exports.subcommand()
- # 脚本会持续运行等待输入
- input()
运行脚本之后发现可以实现多机器,批量,自动化调用。
参考致谢
https://wx.zsxq.com/dweb2/index/group/15285125185812https://juejin.cn/post/6847902219757420552[url]https://mp.weixin.qq.com/s/LLRQtCHpoe1AjNsn5kHaxQ[/url]
|
|


 发表于 2021-3-9 19:43:00